
Greetings
This is Vivek Sony, a software engineer at Money Forward, Inc.‘s Human Resource Solution Department.
Introduction
Hey everyone! Today, I’m excited to share a detailed diary of how our team at HRIS successfully integrated Next.js into our frontend codebase. This wasn’t just a simple upgrade; it was a strategic shift from Vue to React. We faced numerous challenges, made tough decisions, and learned a ton along the way. Let’s dive in!
The Beginning: Why the Switch?
Our journey began with a crucial realization: Vue 2 and Nuxt 2 were nearing their end of life. We had two options: upgrade to Vue 3 or transition to React.js. We chose React for a more generalized solution across the organization, and having more community support. Plus, Vue 3 would have brought significant breaking changes, making React a more appealing long-term choice.
Proposed Ideas for Moving to React
Once we decided on React, we needed a solid migration plan. Two key questions drove our strategy:
- At what rate should we move the code base?
- How do we move the contents to React?
For the first question, we considered moving page by page, but ultimately chose to move component by component. This allowed us to manage bandwidth more effectively and minimize the impact of changes.
For the second question, we explored adding sub-routing for React pages but decided to use components as Micro-frontends (MFE). This approach gave us the flexibility to migrate components at our own pace.
The Execution for MFE: The Initial Steps
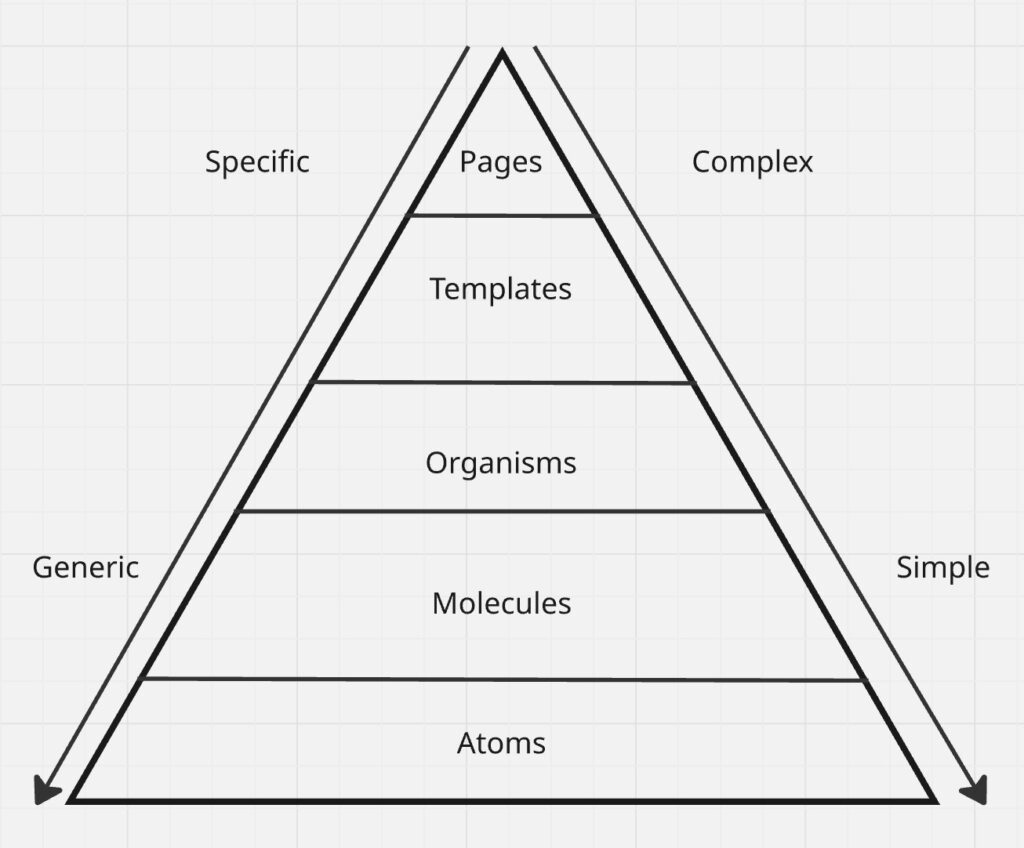
With our strategy in place, we tackled the execution. We decided to move the simplest, most generic components first—the atom components. This minimized dependencies and complexity.
To use React components in our Vue application, we leveraged Liberated Components, an in-house library initially designed for React-to-React MFEs. We updated it to support Vue components as well.
Liberated Components: How They Work
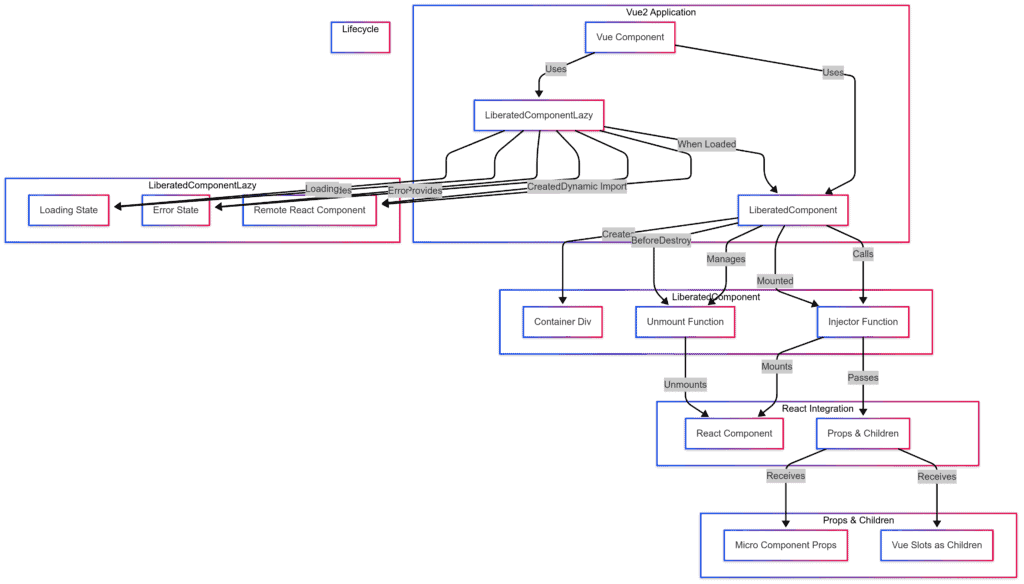
To give you a quick overview of the mechanism behind liberated components, internally, we have two primary components: LiberatedComponent.Vue and LiberatedComponentLazy.vue.
- LiberatedComponent.Vue handles the core logic of embedding the React component within Vue. It does this by creating a div, assigning it a unique ID (using UUID), and then utilizing an injector function. This injector function passes the necessary data for the React component, such as the container element and props, into the created div.
- LiberatedComponentLazy.vue manages loading and error states for the React component. It takes the URL to load the React component.
Pages as MFE
As we migrated more components, we started building larger React components, and eventually we were able to move most of the content of a page as one component( except the sidebar and the header). This allowed us to gradually shift functionality without disrupting the user experience. We ensured that the developer experience remained consistent, making it easy for the team to adopt the new components.
Moving to Next.js: The Bigger Picture
Integrating Next.js required careful planning. We set several goals:
- Complete the migration within six months.
- Minimize disruption to other teams’ development processes.
- Release changes gradually.
- Maintain backward compatibility.
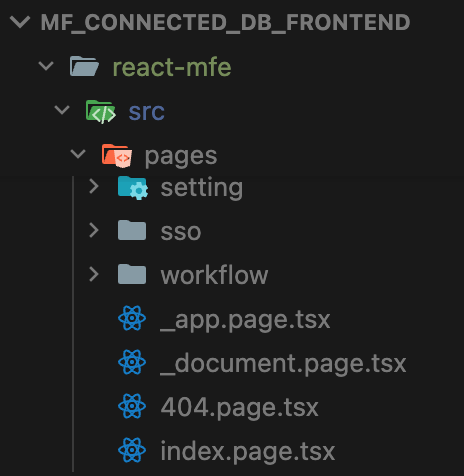
Luckily, our React directory already followed Next.js page routing standards, which simplified the transition. We focused on core functionalities like authentication, routing, and state management.
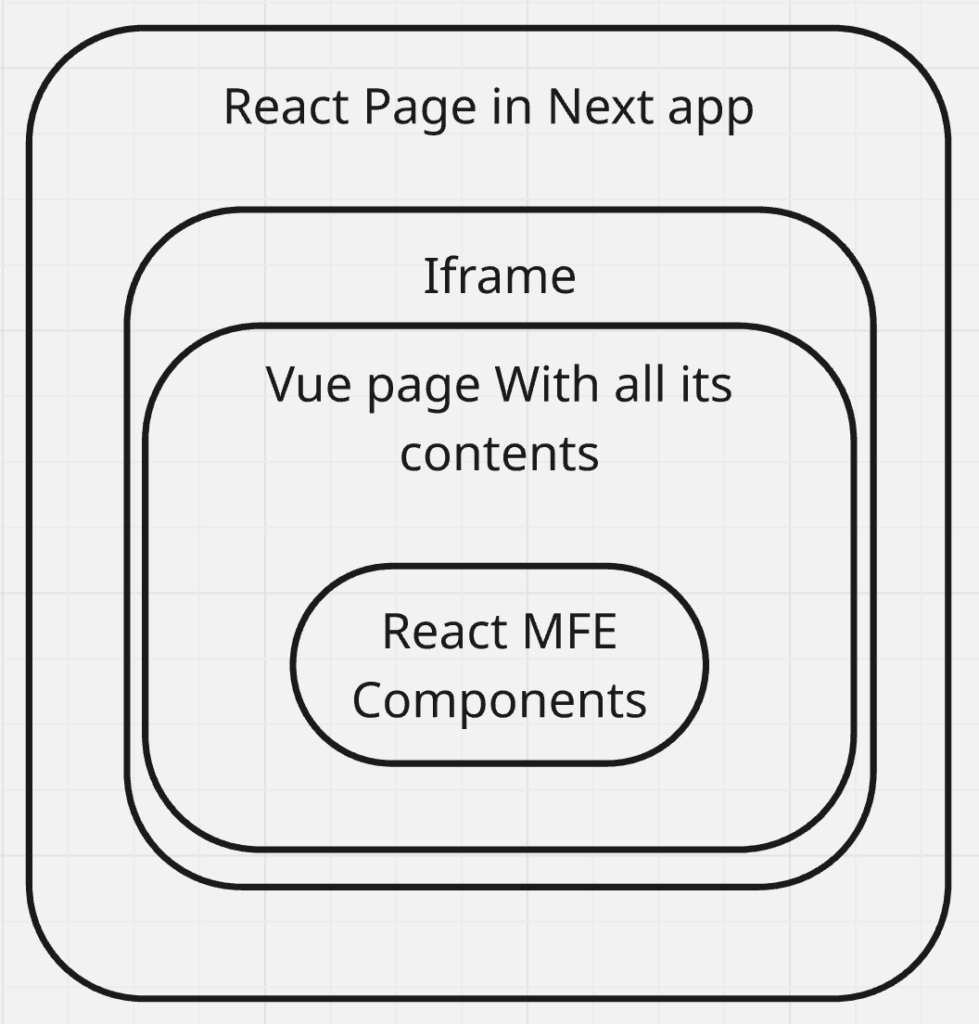
Embedded Vue Pages
We needed a way to integrate existing Vue pages into our Next.js application. We considered using Liberated Components again, but opted for iframes. Iframes offered a quicker, plug-and-play solution with fewer CSS issues.
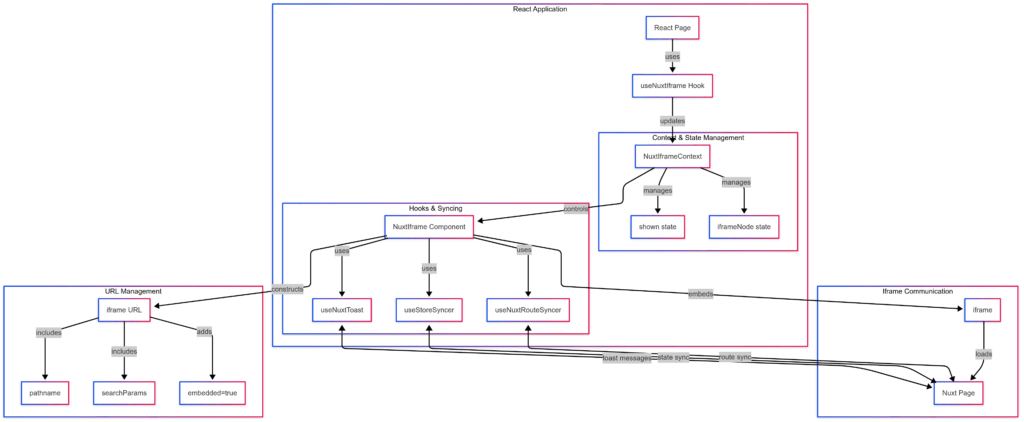
The embedding is primarily achieved using the useNuxtIframe hook. This hook serves two primary purposes: it controls the visibility of the iframe (whether to render it or not) and manages the iframe state via the NuxtIframeContext.
NGINX Behind the Scenes
We use NGINX to serve our pages, and a key aspect of this setup is how NGINX determines whether to serve a Nuxt or Next page. This is achieved through the use of a query parameter in the URL. If the URL contains ?embedded=true, NGINX serves the page from the Nuxt pages; otherwise, it serves the page from the Next pages.
Bridging Nuxt and Next
Our application now has three types of pages:
- Pure React pages (in Next.js)
- Iframe Vue pages (Vue pages in iframes within Next.js)
- Pure Vue pages (in Nuxt.js)
Our goal was to eventually have only Pure React or Iframe Vue pages. We built bridges for:
- Authentication: We built a new authentication system for Next.js with backward compatibility for Nuxt.
- State Management Synchronization: We used Zustand for React and communicated state changes via postMessage events between Vuex and Zustand.

- Route Synchronization: We handled various routing scenarios using the postMessage event to communicate between the Nuxt and Next routers.

Release Strategy
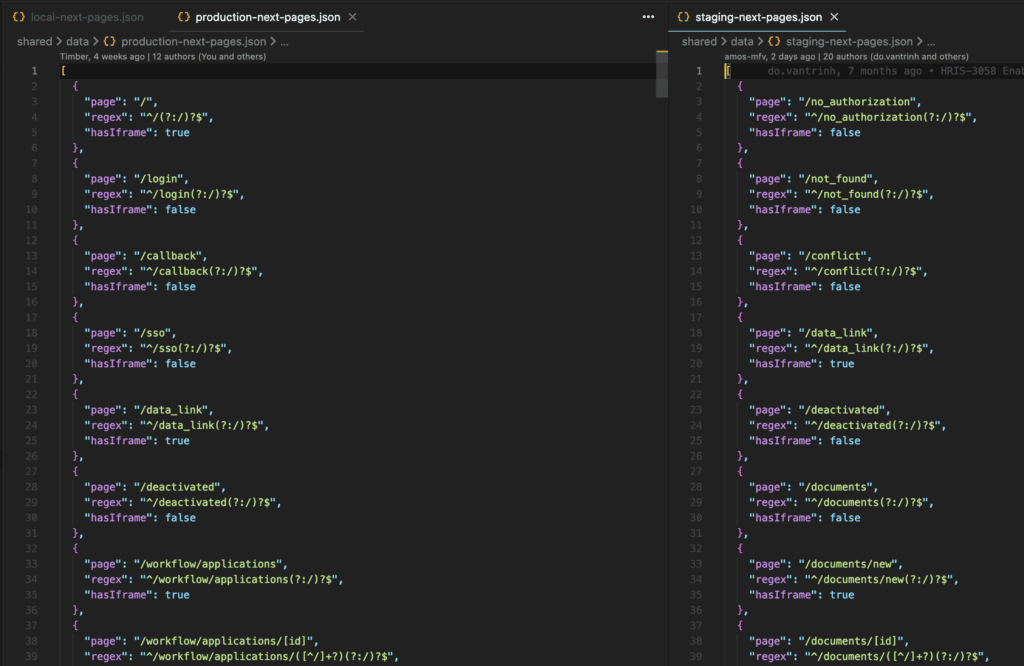
We adopted a gradual release strategy to minimize risks. We used NGINX to route pages based on a JSON configuration, indicating which pages were available in Next.js. An Excel sheet helped us track the migration progress and communicate with QA. Eventually, we did a final release in maintenance mode to move root pages such as login and callback pages to Next.js.
Outcomes
Our migration was a success!
- We had zero incidents in production.
- All 120 pages now use Next.js for core functionalities.
- Developers are actively working on new features in React.
- LCP improved by approximately 50%.
- Currently, 50% of our pages are natively in React.
Conclusion
Migrating from Nuxt to Next was a challenging but rewarding journey. We learned valuable lessons about planning, execution, and teamwork. We’re proud of what we’ve accomplished and excited for the future of our frontend!
I hope this gives you a good overview of our migration process. Let me know if you have any questions!