
Introduction
Hello! My name is Muhammad Garebaldhie ER Rahman (Call me Gare), a full-stack Software Engineer at Money Forward Cloud Human Resources Management Group, HR Solutions Department. I began coding 4 years ago during college, primarily using VSCode or JetBrains IDEs for daily development. About a year ago, I fell down the Vim rabbit hole and quickly grew to love it. I started by tinkering with Vim, configuring it properly for daily development tasks. Eventually, I transitioned from Vim to Neovim, which offers more configurability by using Lua instead of .vimrc. I’ve been loving Neovim so far, though I’ve spent countless hours fine-tuning my configuration.
The Neovim Challenge
While Neovim offered incredible text editing capabilities, several limitations appeared when using it as my primary development environment:
Collaboration Difficulties
Pair programming became complicated due to:
- Colleagues unfamiliar with Vim keybindings struggling to navigate the editor
- Having to switch back to VSCode when collaborating, negating Neovim’s benefits
Missing VSCode’s Familiar Interface
After three years with VSCode, its UI and shortcuts had become second nature to me. Despite Neovim’s speed advantages, VSCode’s interface remained more intuitive in many scenarios.
Limited Debugging and Testing Capabilities
Working on complex projects revealed Neovim’s limitations as a debugging platform:
- Setting up debugging required multiple plugins and language-specific adapters
- The debugging experience was often slower and less user-friendly
- I found myself developing in Neovim but switching to VSCode for debugging sessions
Finding Middle Ground
After months of switching between both editors, I recognized the fundamental difference: Neovim is a powerful text editor, but not a complete IDE.
Neovim isn’t missing features because it’s deficient – it’s designed as a text editor rather than a full IDE like VSCode.
This realization prompted me to explore solutions that could combine Neovim’s text editing prowess with VSCode’s IDE capabilities. My first attempt with VSCode-Vim extension fell short for several reasons:
- Inconsistent undo behavior: The extension’s undo stack would sometimes merge edits unpredictably
- Limited plugin support: Many of my favorite Neovim extensions weren’t available
- Incomplete Vim experience: The extension only provided basic Vim motions without the full Neovim environment
Cursor: The Game-Changer
At Money Forward, we use Cursor – a VSCode fork with integrated AI capabilities that accelerate development. While appreciating Cursor’s features, I still missed my Neovim setup. After extensive research, I discovered VSCode-Neovim, which offers a perfect integration of both worlds.
It’s worth noting that modern Neovim itself has excellent support for language servers through plugins like Avante.nvim and AI assistance through tools like Copilot.vim. These tools provide intelligent code completion, diagnostics, and AI assistance directly within Neovim. Many Neovim distributions like LazyVim include these features and we can enable them easily. However, I found that combining Neovim’s text editing capabilities with Cursor provided the most seamless development experience for my workflow.
Environment
To provide context for the configurations I’m about to discuss, here is the environment in which they were executed:
Operating System:
- Mac OS: Sonoma 14.7 (23H124)
Cursor Versions:
- Version: 0.49.6
- VSCode Version: 1.96.2
- Commit: 0781e811de386a0c5bcb07ceb259df8ff8246a50
- Date: 2025-04-25T05:07:16.071Z
- Electron: 34.3.4
- Chromium: 132.0.6834.210
- Node.js: 20.18.3
- V8: 13.2.152.41-electron.0
- OS: Darwin arm64 23.6.0
Neovim Version:
- NVIM v0.11.1
- Build type: Release
- LuaJIT 2.1.1744318430
Additional Tools and Libraries:
- Homebrew: Homebrew 4.5.0
- Mise: 2025.5.0 macos-arm64 (2025-05-03)
- LazyGit:
- version=0.50.0
- os=darwin
- arch=arm64
- git version=2.39.5 (Apple Git-154)
- LazyVim Version: https://github.com/LazyVim/starter/commit/803bc181d7c0d6d5eeba9274d9be49b287294d99
Setting Up Neovim
Installation
Install Neovim by following the instructions on the GitHub page.
For macOS users:
brew install neovimVerify your installation by running nvim in your terminal.
Choosing a Distribution
The Neovim community offers several pre-configured distributions to simplify getting started:
Each distribution includes configurations, plugins, and UI enhancements that let you use Neovim with minimal setup.
Installing LazyVim
I’ll demonstrate using LazyVim, my personal preference. Skip this step if you already have a Neovim configuration you’re happy with.
- Back up any existing Neovim configuration:
# Backup configuration files
mv ~/.config/nvim{,.bak}

# Backup plugins and cache
mv ~/.local/share/nvim{,.bak}
mv ~/.local/state/nvim{,.bak}
mv ~/.cache/nvim{,.bak}- Install LazyVim:
git clone https://github.com/LazyVim/starter ~/.config/nvim
rm -rf ~/.config/nvim/.git- Launch Neovim and wait for the installation to complete:
nvim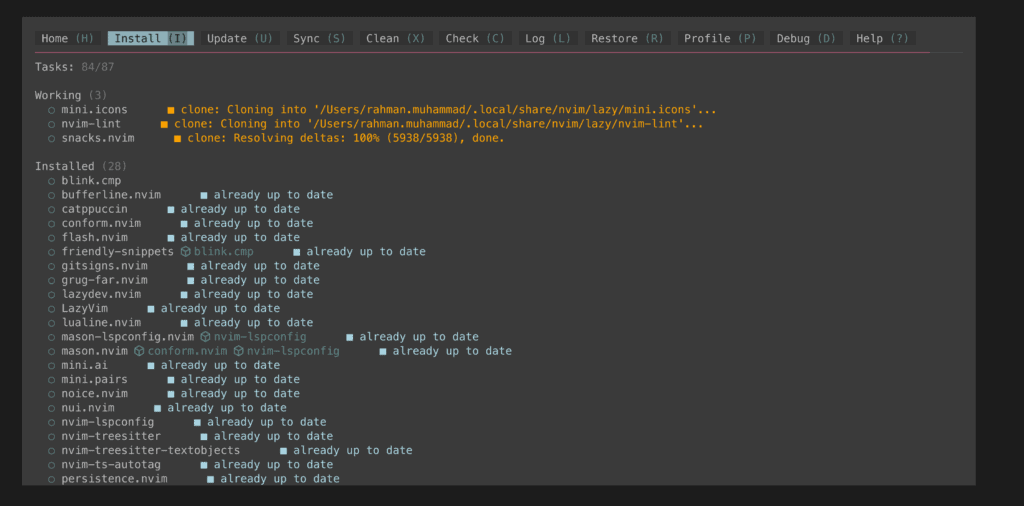
For detailed instructions, see the LazyVim documentation.
Enabling VSCode Integration
LazyVim includes VSCode integration by default. To enable it:
- Open the LazyExtras menu:
:LazyExtrasAlternatively, launch Neovim and press x.
- Search for
vscodeby typing/vscode - Enable it by pressing
xon the corresponding entry
Integrating with Cursor
Installing the VSCode-Neovim Extension
- Open Cursor’s extension page and search for
VSCode-Neovim - Install the extension
- Configure the Neovim path:
First, locate your Neovim executable:
which nvim
# /opt/homebrew/bin/nvim- Open Cursor’s settings by pressing
Cmd+Shift+Pand typingPreferences: Open User Settings (JSON) - Add the following configuration (for macOS):
{
  "vscode-neovim.neovimExecutablePaths.darwin": "/opt/homebrew/bin/nvim",
  "vscode-neovim.neovimInitVimPaths.darwin": "~/.config/nvim/init.lua"
}
For more details, see the VSCode-Neovim installation guide.
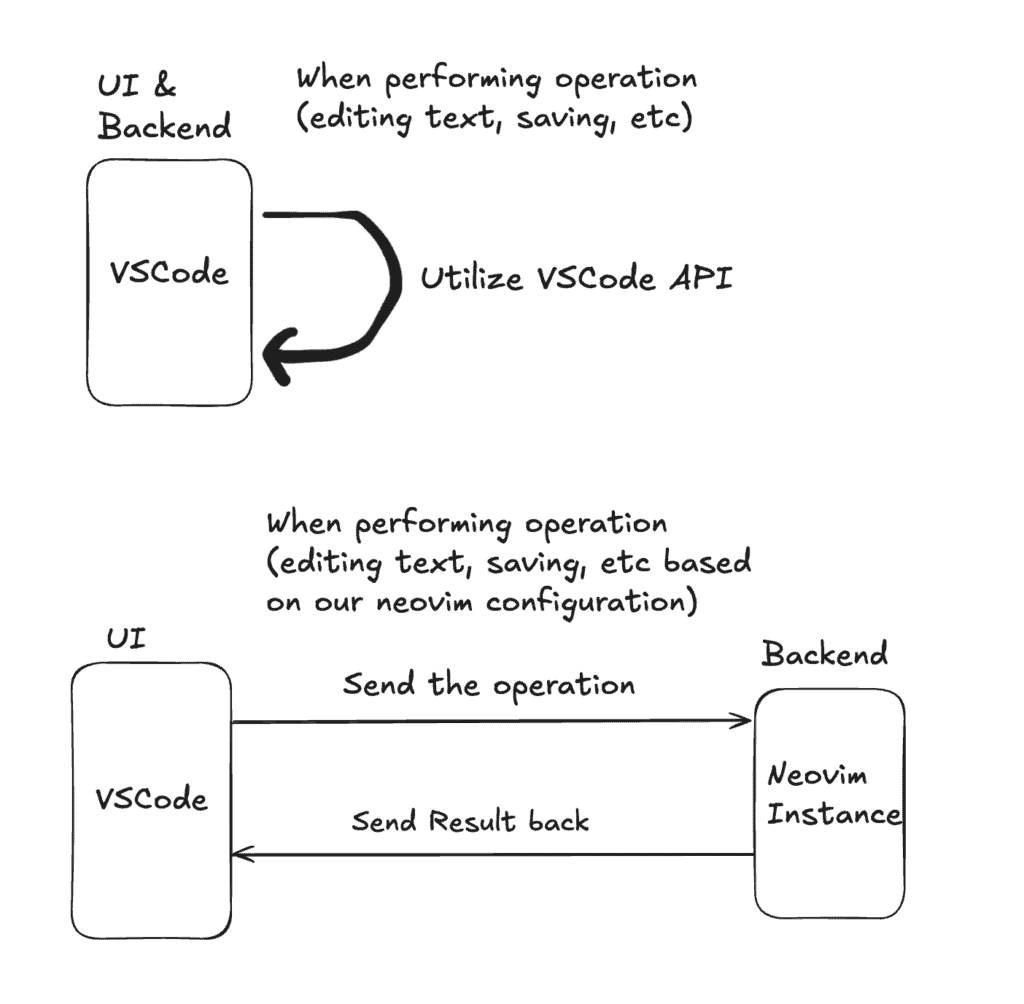
How It Works
The VSCode-Neovim extension uses Neovim’s API as the backend for text editing operations within Cursor. You can see the available shortcuts by pressing Cmd+Shift+P, typing Preferences: Open Keyboard Shortcuts, and searching for vscode-neovim.
See more details in VSCode-neovim Github Page
Resolving Cursor-Specific Issues
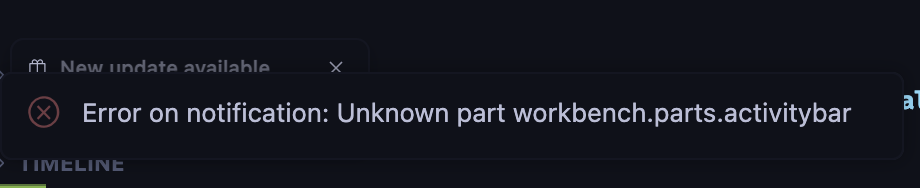
Despite Cursor being a VSCode fork, some compatibility issues exist. Cursor uses a horizontal left menu by default, which generates an error with VSCode-Neovim: unknown part workbench.parts.activitybar.

To fix this:
- Open Cursor settings with
Cmd+Shift+Pand typePreferences: Open User Settings (JSON) - Add:
{
  "workbench.activityBar.orientation": "vertical"
}- Reload your editor
After saving and reloading, you’ll see the familiar VSCode-style vertical navigation bar.

Experiencing the Best of Both Worlds
With this setup complete, you can now enjoy:
Vim/Neovim Motion Commands
Use all the familiar Vim motions and text editing commands you’ve come to love. Access the full range of Vim’s powerful editing capabilities, including:
- Motions: Navigate and position cursor with precision (w, b, f, t, etc.)
- Operators: Execute efficient text transformations through command combinations (d, c, y combined with motions)
Seamless UI Navigation
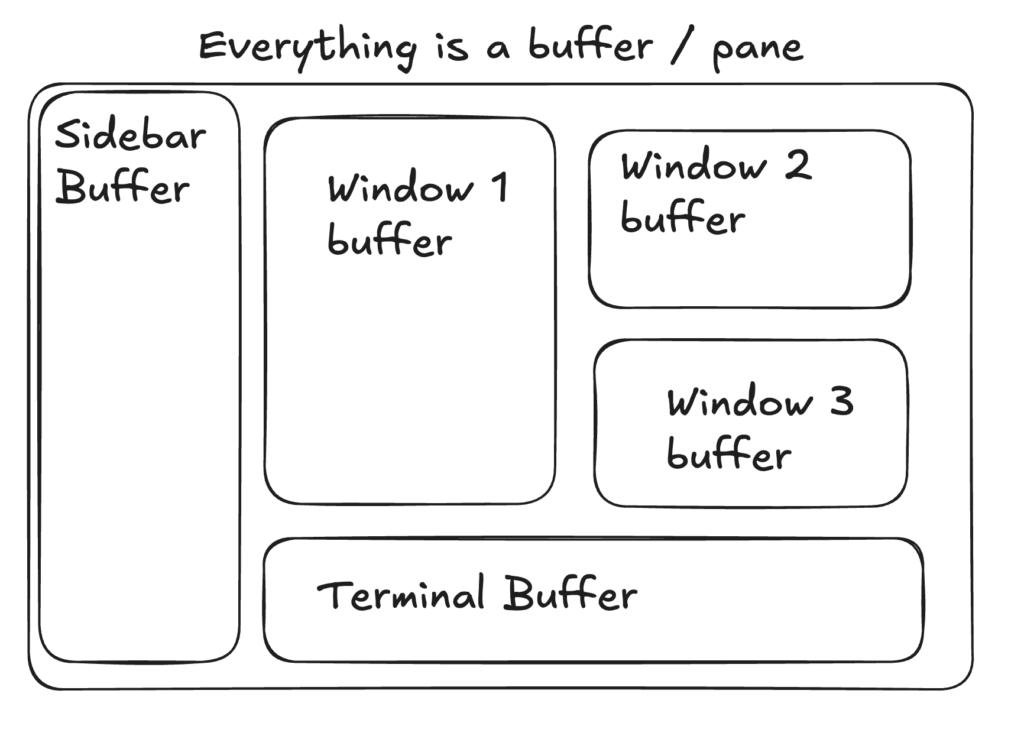
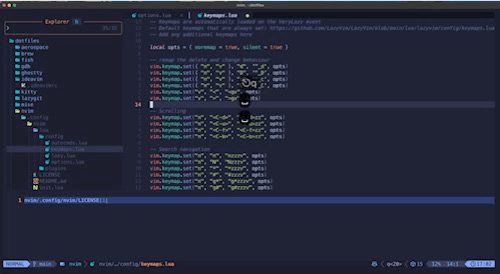
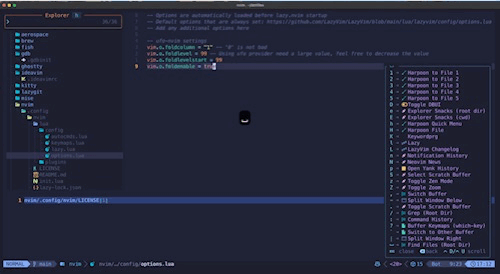
Navigate between panes, terminal, file explorer, and other UI elements using Ctrl + h, j, k, l without touching the mouse. We can even move from the Cursor AI Prompt to the file manager without touching the mouse. Why? because everything is a buffer and panes. You can look at this illustrations to help give better understanding about buffer and panes
We also can use these command to manipulate the buffer
space+|to split horizontalspace+-to split vertical
File Explorer Integration
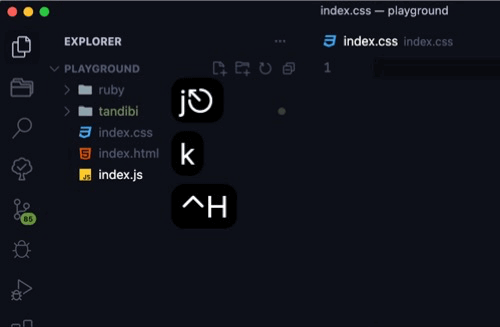
You can navigate the File explorer with hjkl you also can do several operation a for adding new files x for cut c for copy r for rename
And many more!
See vscode-neovim-file-navigation for more reference
VSCode’s Familiar Interface and Shortcuts
We can continue using VSCode’s interface and keyboard shortcuts when preferred while also utilizing all of the neovim capabilities.
How to Customize our Cursor from neovim
Some of the neovim commands are not works out of the box. For example, in neovim we can use <leader>e to open the file explorer and do <leader>space to search files (telescope.nvim), but this won’t work in cursor by default. That’s because cursor doesn’t have the floating ui or window. To solve this, we need to remap some of the neovim keybind and match it with cursor API.
LazyVim provides easy way to integrate custom commands. We can define commands from our neovim so that it will be mapped with the Cursor API. For exapmle, we can map LazyVim will export vscode global object for us to use. The easiest way is to add this config inside of your nvim/lua/config/keymaps.lua. In this example, i will provide some commands to toggle the terminal and sidebar visibility
if vim.g.vscode then
  local opts = { noremap = true, silent = true }
  local keymap = vim.keymap.set

  -- Sidebar and Terminal visibility
  keymap(
    { "n", "v" },
    "<leader>t",
    "<cmd>lua require('vscode').action('workbench.action.terminal.toggleTerminal')<CR>",
    opts
  )
  keymap(
    { "n", "v" },
    "<leader>e",
    "<cmd>lua require('vscode').action('workbench.action.toggleSidebarVisibility')<CR>",
    opts
  )

  -- or you can also do this instead
  local vscode = require("vscode")

  keymap({"n", "v"}, "<leader>t", function()
    vscode.action("workbench.action.terminal.toggleTerminal")
  end, opts)

  -- insert more configuration
end
Note:
- This way might be different for other distribution of Neovim, please look at the respective community provider
- You need to look for the documentation for which action can you do from the API
Enhancing the Experience with Plugins
To further improve productivity, I recommend these quality-of-life plugins and how to setup them to enhance my workflow:
LazyGit
LazyGit provides a simple terminal UI for git commands. LazyGit uses the same commands as Vim motion for navigation, that’s why you can forgot about the usual git commands when you’re using this commands.
# I use this command to open lazy git
<leader>gg
-- add this blocks inside of the if `vscode` block
-- this command will toggle the terminal and sends lazygit string then execute it
keymap("n", "<leader>gg", function()
  vscode.action("workbench.action.terminal.toggleTerminal")
  vscode.action("workbench.action.terminal.sendSequence", { args = { text = "lazygit\n" } })
end, opts)
Which Key
Which Key displays available keybindings in a popup to help you remember commands.
To simulate this behavior in vscode, you can use this extension VSCode which key
-- Show whichkey using VSCode actions, you can remap it to anything you like :)
keymap({ "n", "x"}, "<leader><Space>", function()
  vscode.action("whichkey.show")
end, opts)
Harpoon
Harpoon allows you to mark and quickly switch between frequently used files
To simulate this behavior in vscode, we have Cursor/VSCode Version
local opts = { noremap = true, silent = true }
  -- harpoon keymaps
  keymap({ "n", "v" }, "<leader>ha", "<cmd>lua require('vscode').action('vscode-harpoon.addEditor')<CR>", opts)
  keymap({ "n", "v" }, "<leader>ho", "<cmd>lua require('vscode').action('vscode-harpoon.editorQuickPick')<CR>", opts)
  keymap({ "n", "v" }, "<leader>he", "<cmd>lua require('vscode').action('vscode-harpoon.editEditors')<CR>", opts)
  keymap({ "n", "v" }, "<leader>h1", "<cmd>lua require('vscode').action('vscode-harpoon.gotoEditor1')<CR>", opts)
  keymap({ "n", "v" }, "<leader>h2", "<cmd>lua require('vscode').action('vscode-harpoon.gotoEditor2')<CR>", opts)
  keymap({ "n", "v" }, "<leader>h3", "<cmd>lua require('vscode').action('vscode-harpoon.gotoEditor3')<CR>", opts)
  keymap({ "n", "v" }, "<leader>h4", "<cmd>lua require('vscode').action('vscode-harpoon.gotoEditor4')<CR>", opts)
  keymap({ "n", "v" }, "<leader>h5", "<cmd>lua require('vscode').action('vscode-harpoon.gotoEditor5')<CR>", opts)
Project Manager
This extension helps you organize and quickly switch between projects. You can add and see your projects by opening the project manager list window. By doing this, you can switch project very fast and do not need to find the folder again
local opts = { noremap = true, silent = true }

-- project manager keymaps
keymap({ "n", "v" }, "<leader>ap", "<cmd>lua require('vscode').action('projectManager.editProjects')<CR>", opts)
keymap({ "n", "v" }, "<leader>sp", "<cmd>lua require('vscode').action('projectManager.saveProject')<CR>", opts)
keymap(
  { "n", "v" },
  "<leader>lp",
  "<cmd>lua require('vscode').action('projectManager.listProjectsNewWindow')<CR>",
  opts
)
Conclusion
By integrating Neovim with Cursor, I’ve created a development environment that leverages the strengths of both tools. This setup combines Neovim’s efficient text editing with Cursor’s IDE features and AI capabilities, resulting in a workflow that’s both powerful and comfortable.
The journey from Vim to Neovim to this integrated solution has taught me that the perfect development environment is one that adapts to your specific needs rather than forcing you to adapt to it. By customizing this setup further, you can create an environment that perfectly suits your workflow.
Final Thoughts
What works for me might not work for you. The most important thing is finding tools that make you productive and happy! 😀
If you have questions about this setup, feel free to reach me via LinkedIn or other social media platforms.
Follow Money Forward LinkedIn for more blogs and updates.